Every Immediate Failure in the Singapore Practical Driving Test (2026) — The Official Checklist
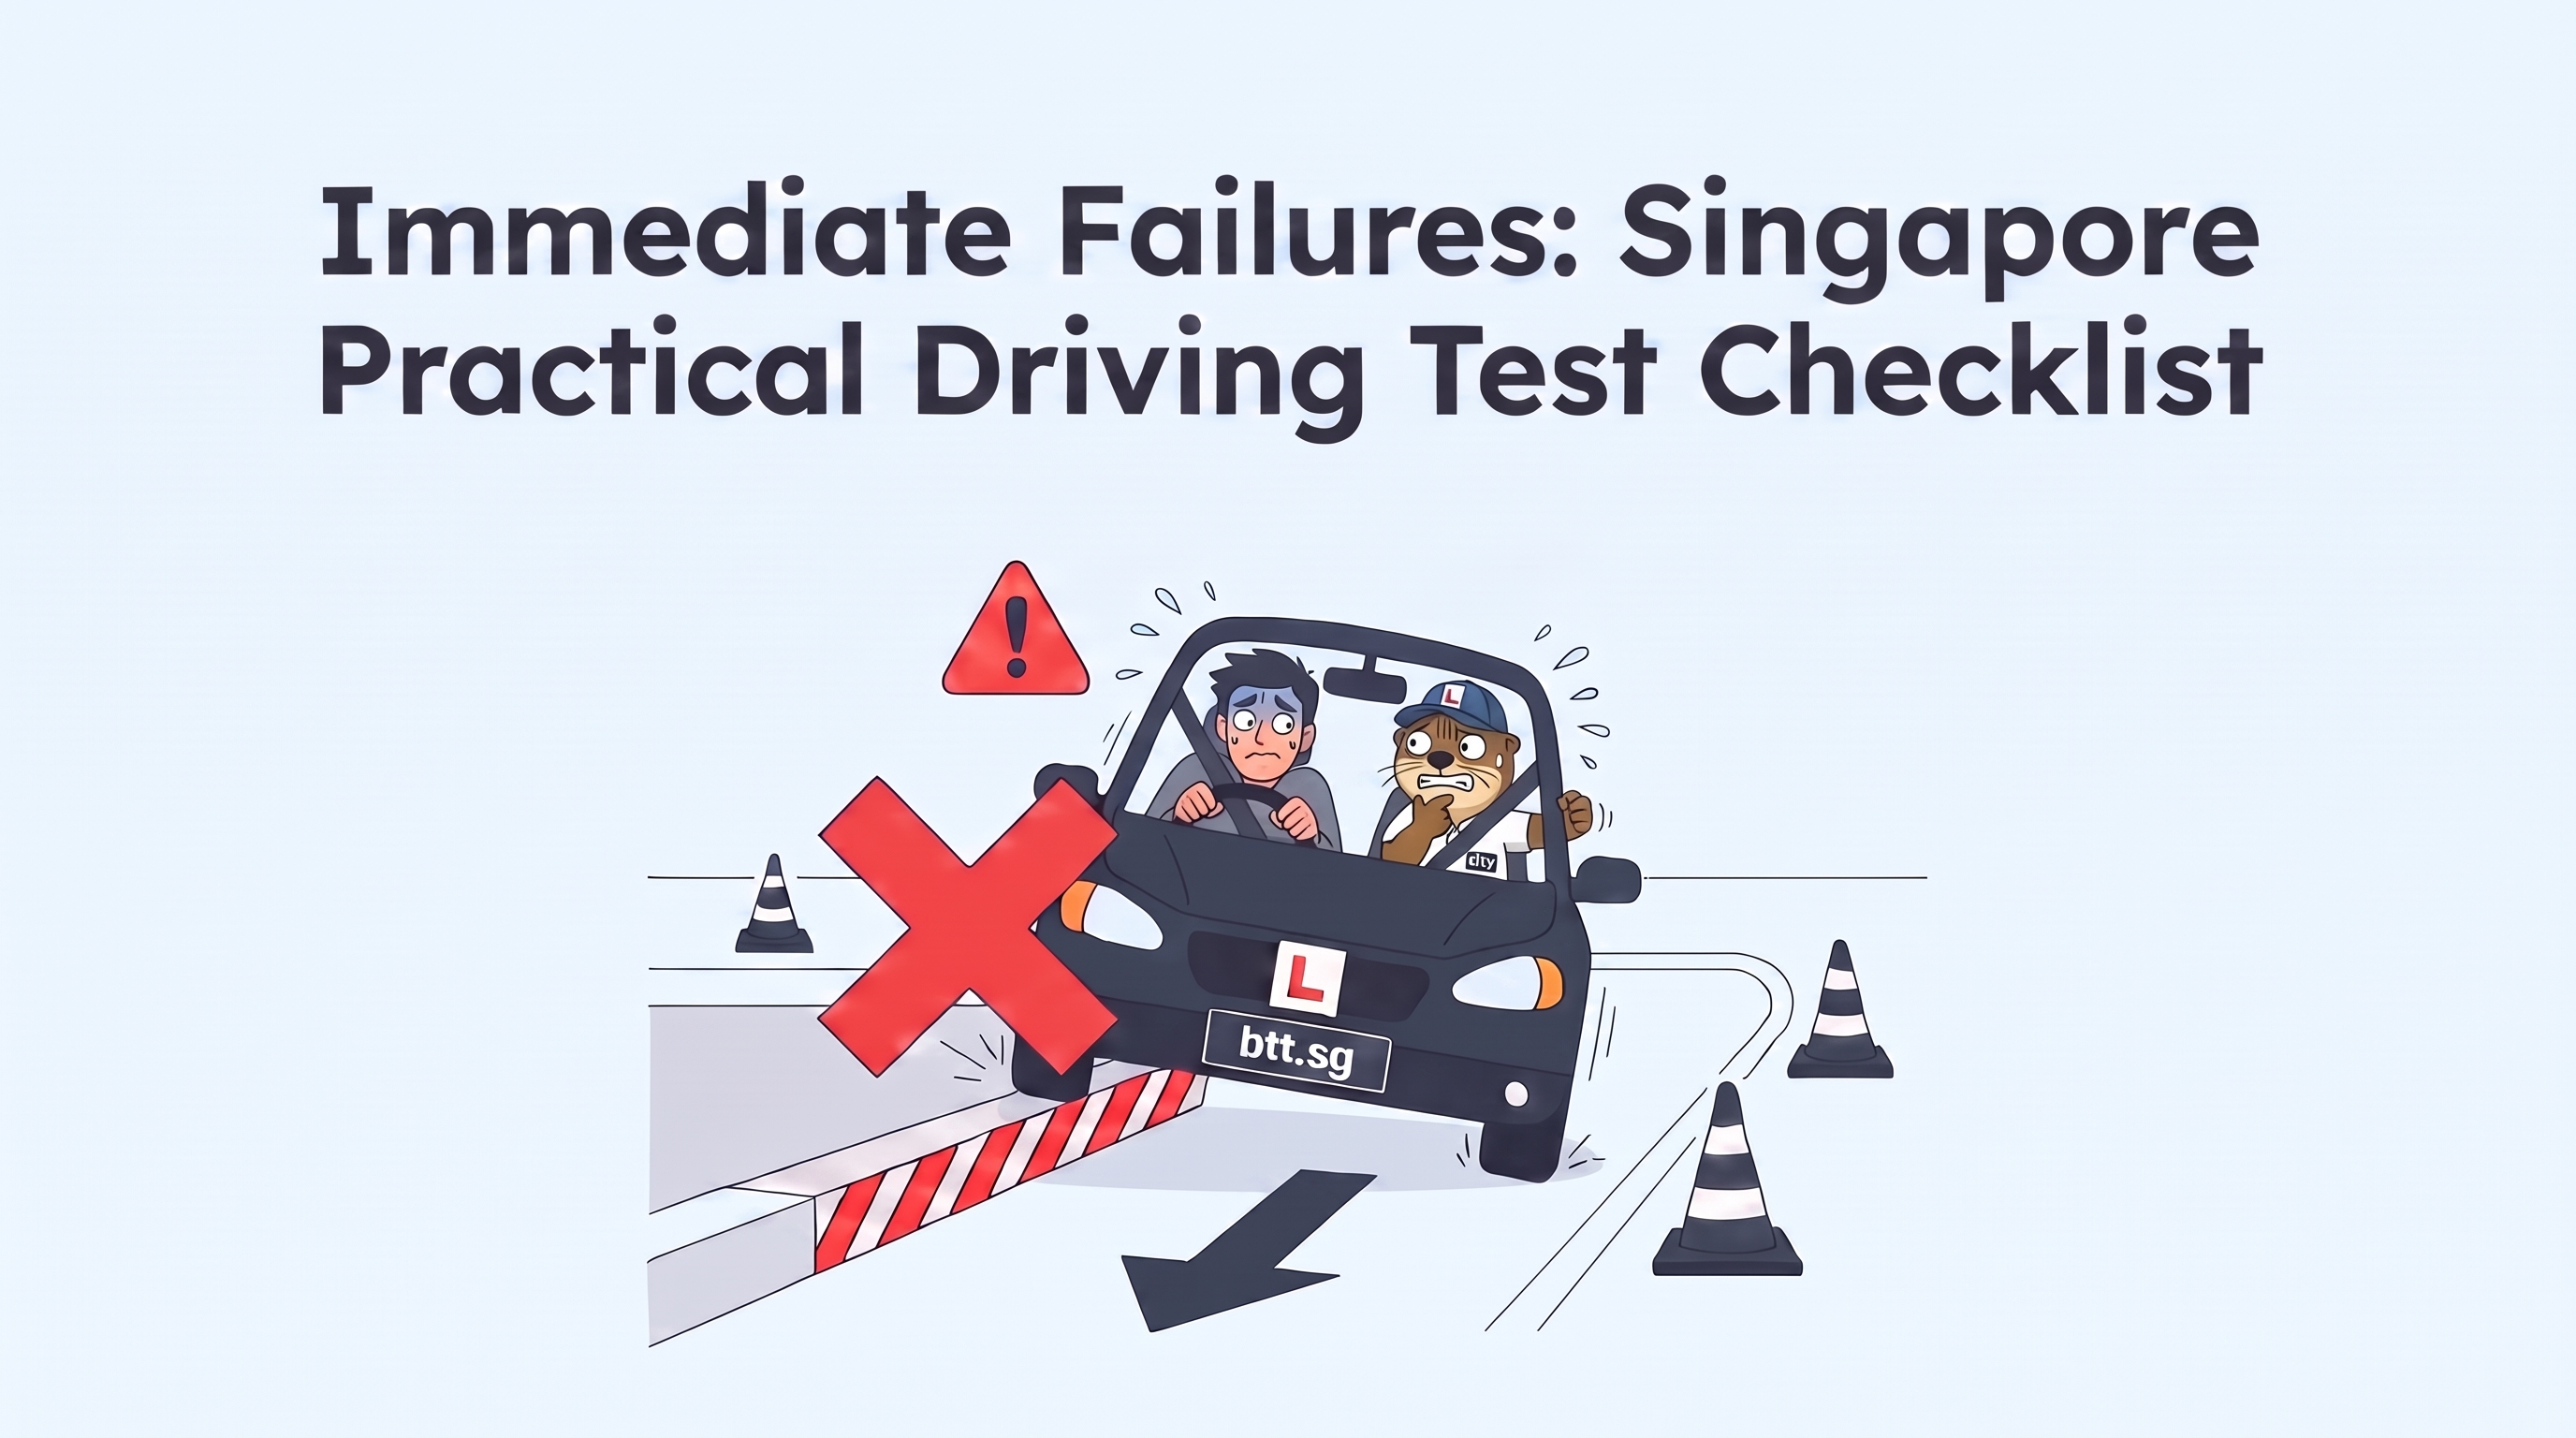
Most learners walk into the Traffic Police practical test knowing they can lose points — but not knowing which mistakes end the test on the spot. Those are the immediate failures, and there are more of them than most learners realise.
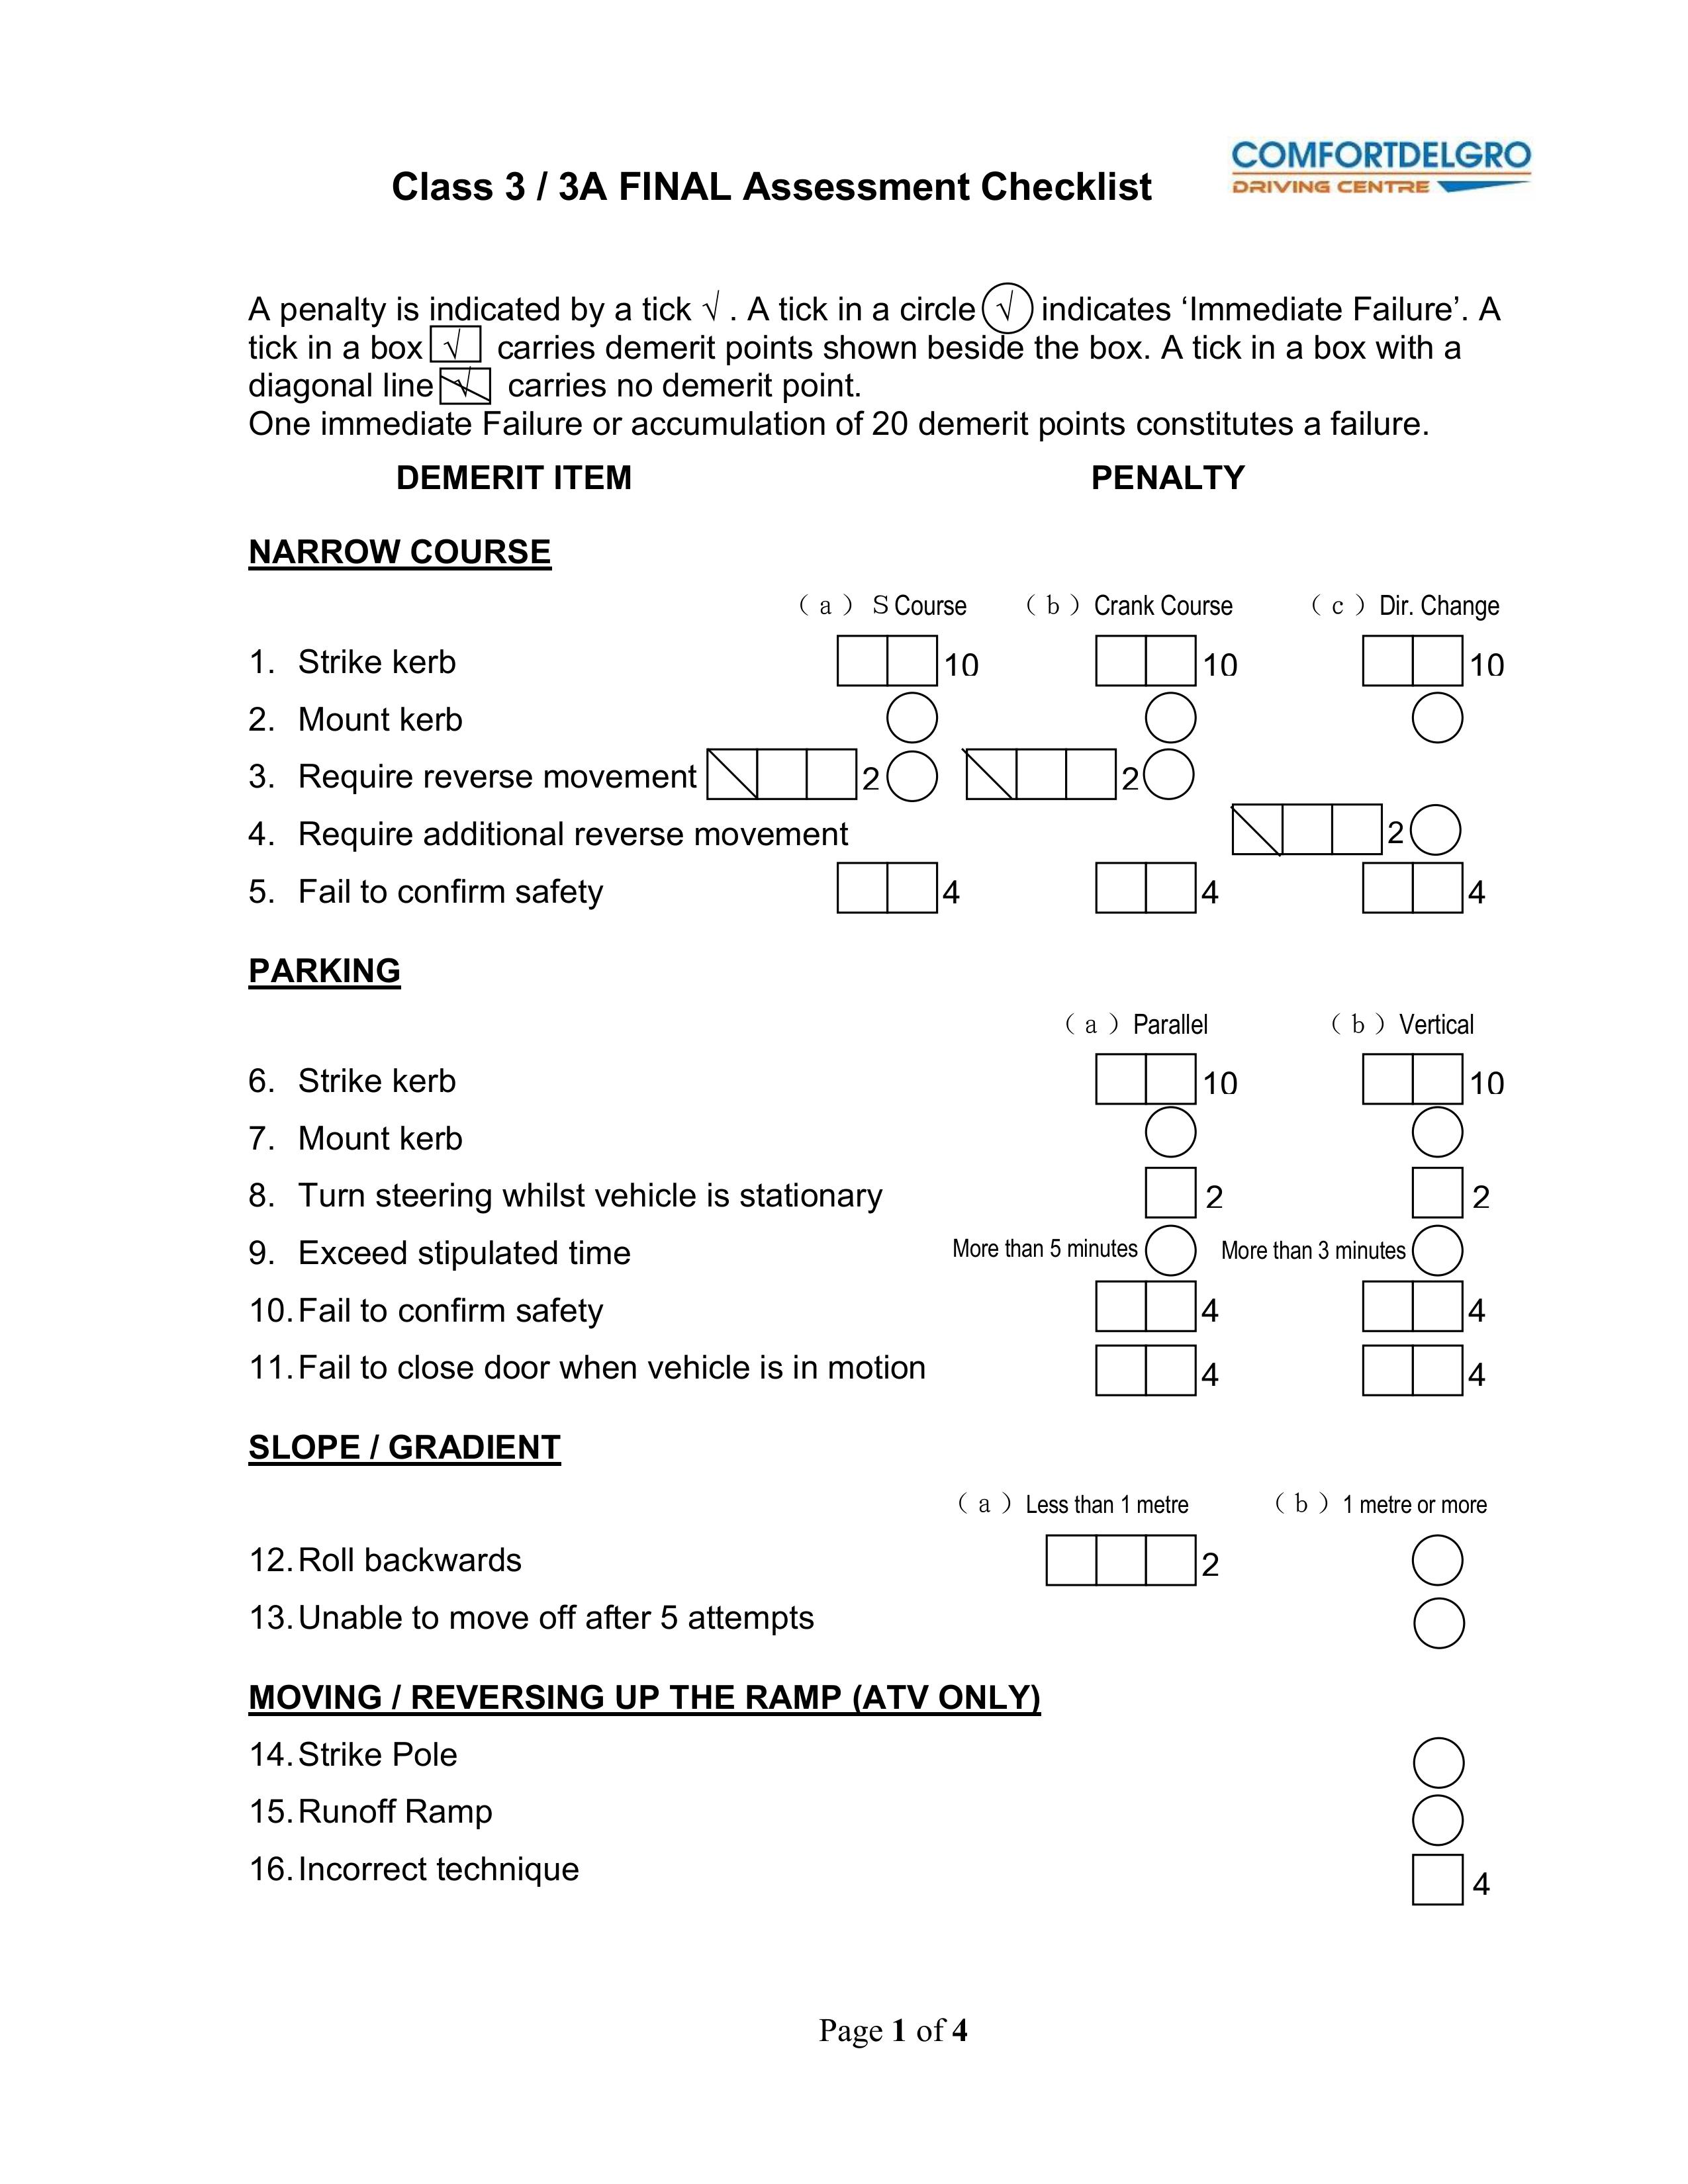
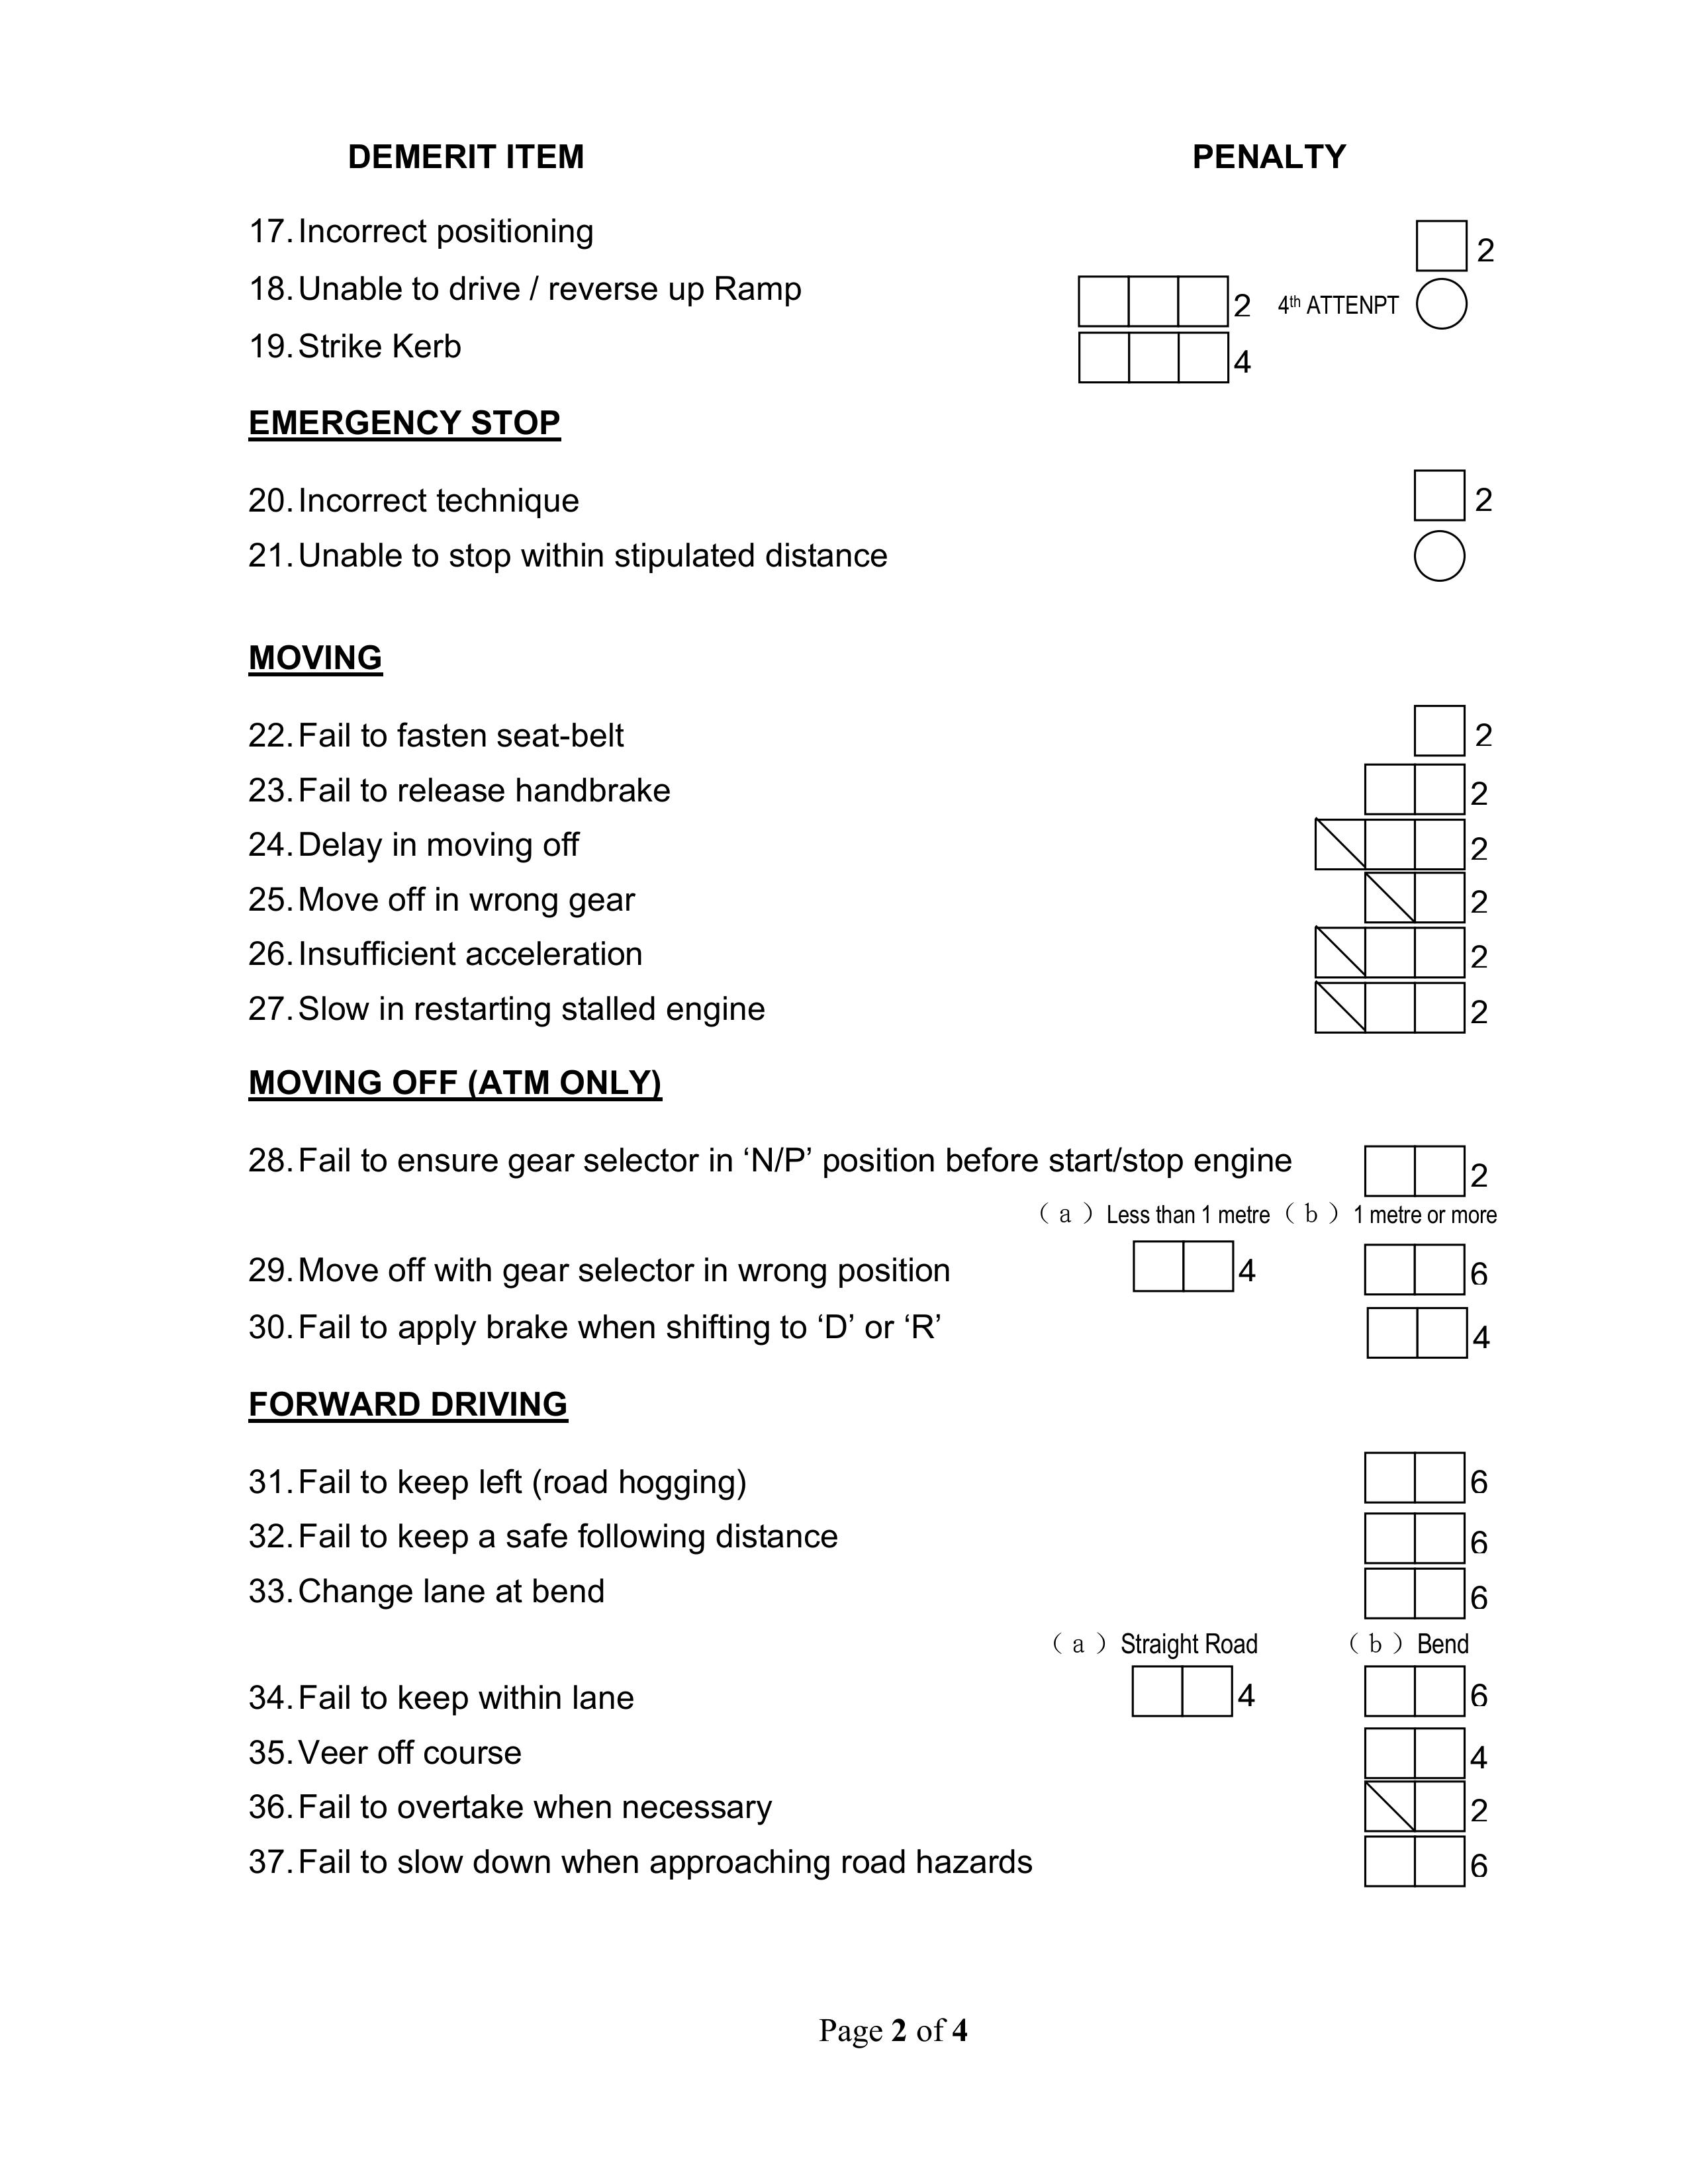
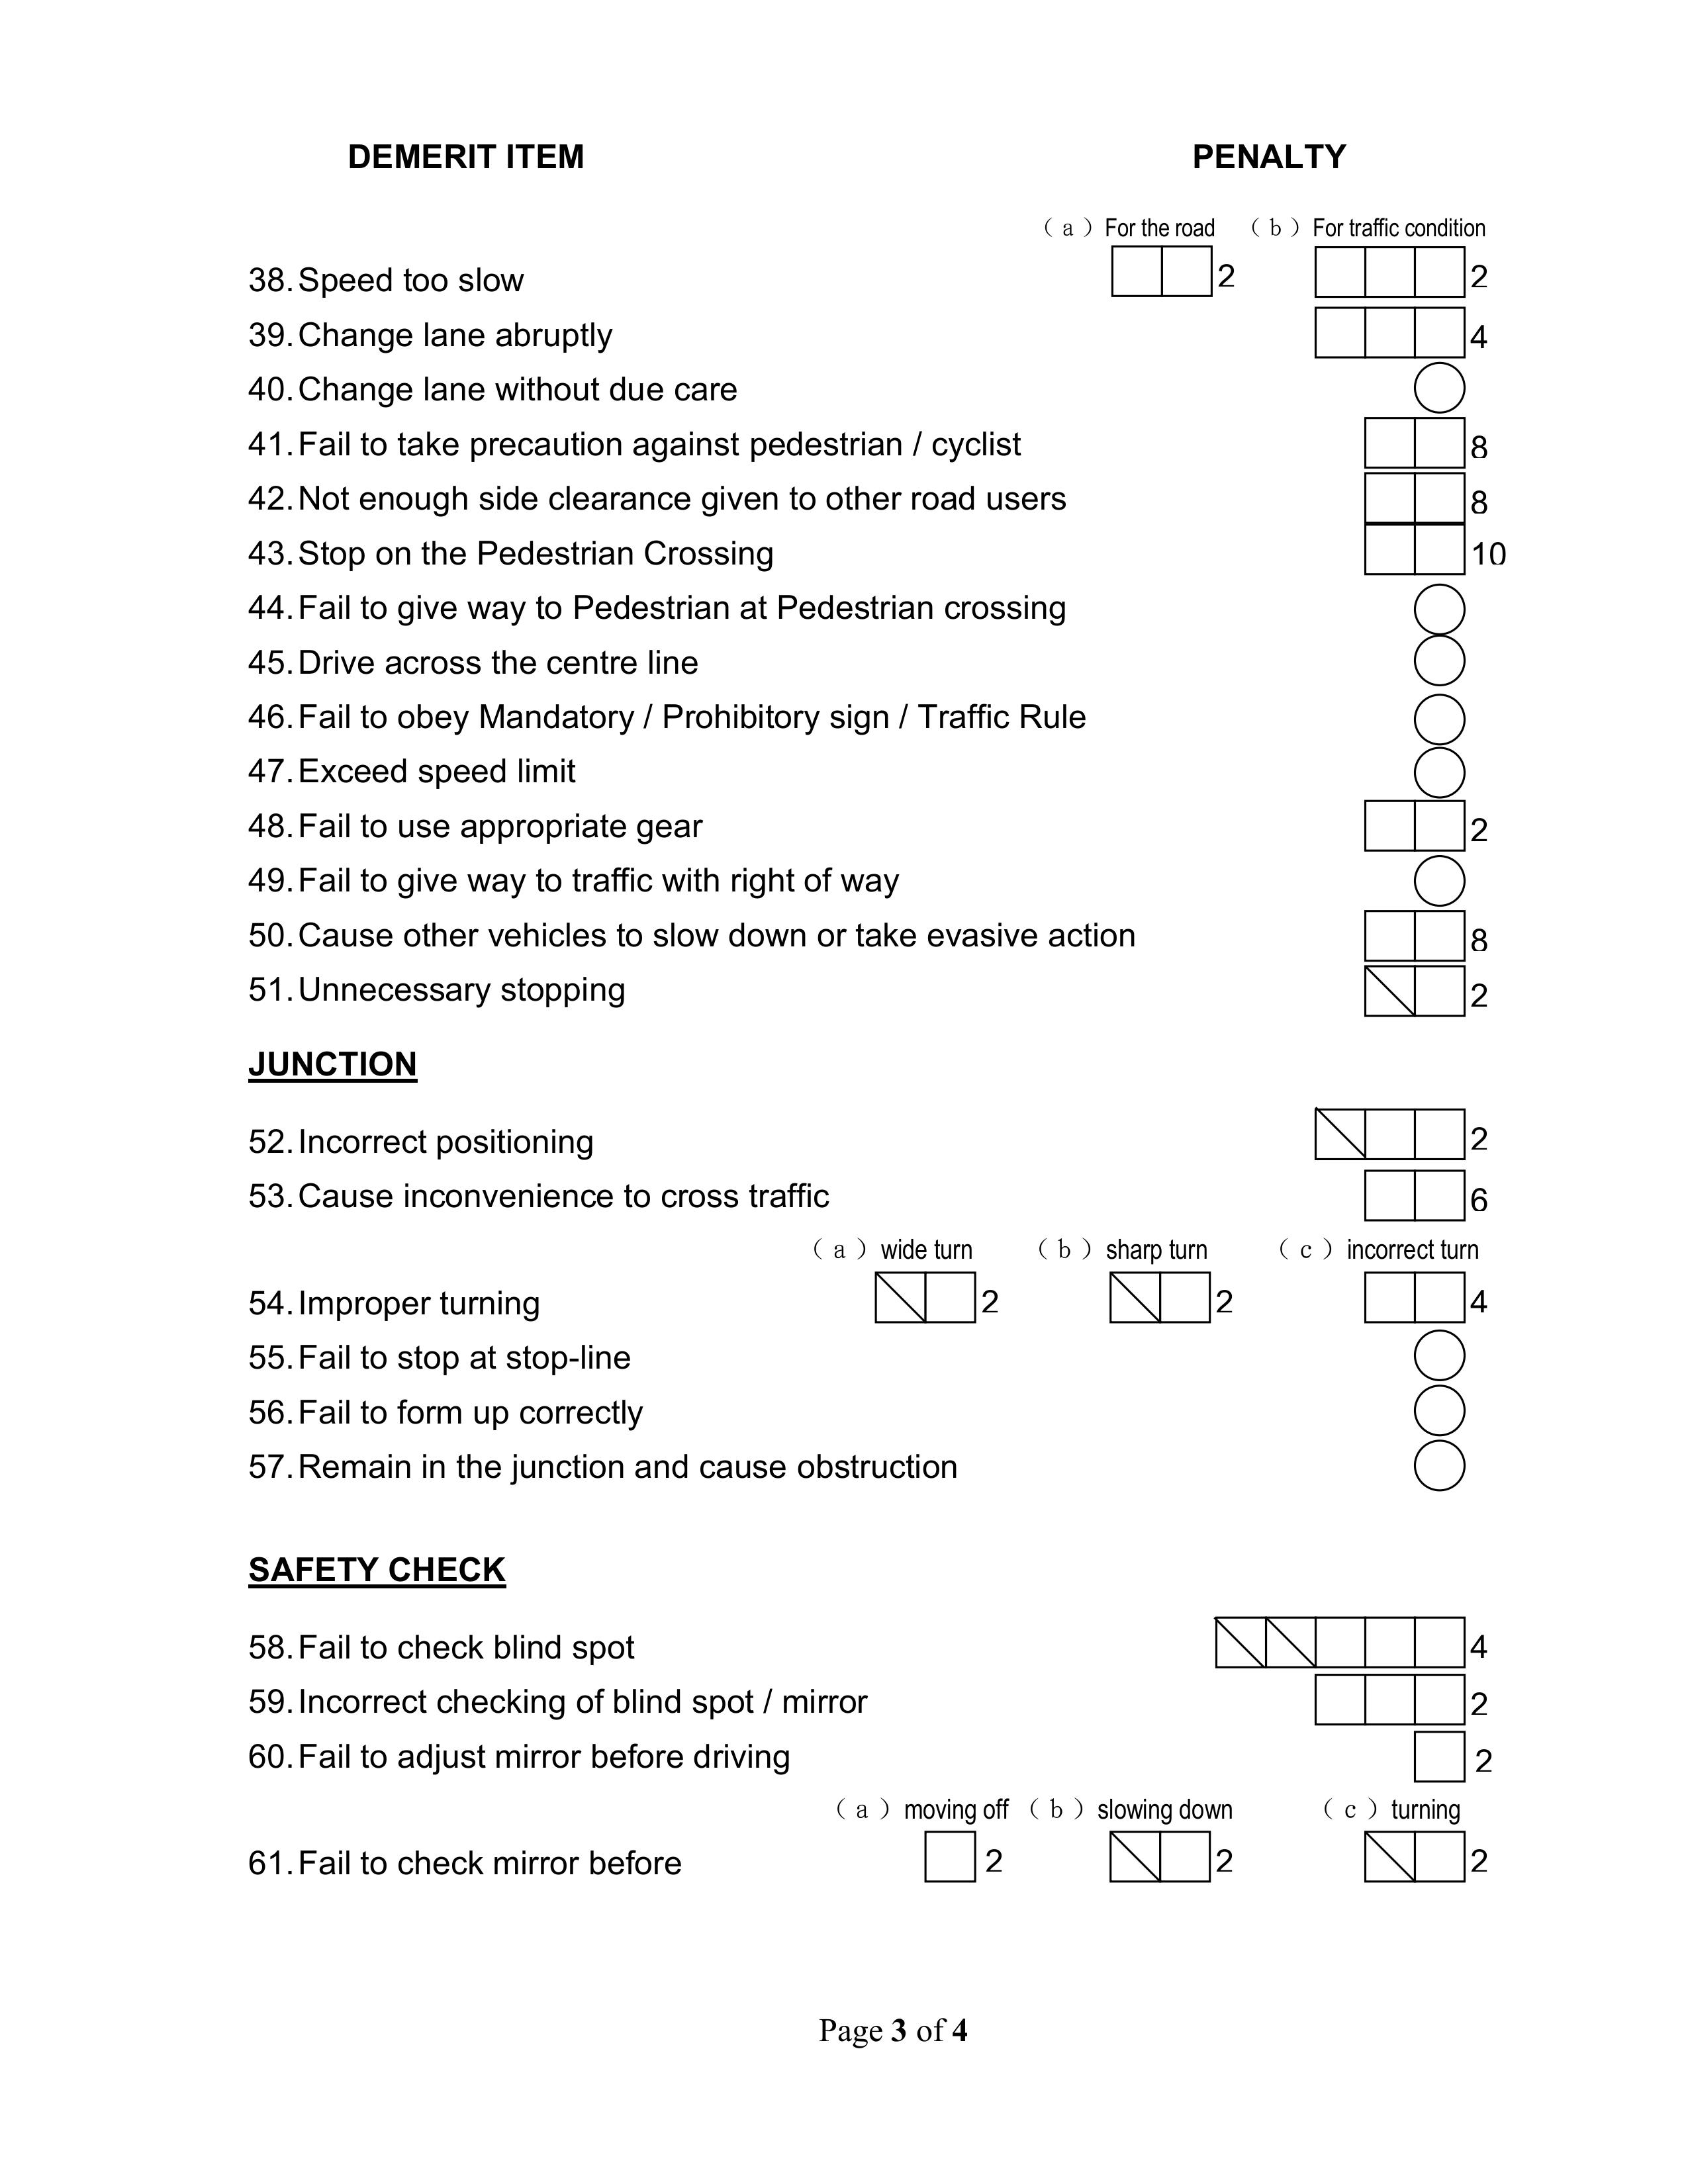
This article lists every single one, straight off the Class 3/3A Final Assessment Checklist published by ComfortDelGro Driving Centre — the 73-item scoring sheet, built on the Traffic Police criteria, that your assessor ticks while sitting beside you. All four pages are reproduced further down so you can read it yourself.
The One Rule That Matters
Printed at the top of the form: "One immediate Failure or accumulation of 20 demerit points constitutes a failure." You are running two separate scoreboards at once — a points counter that must stay under 20, and a pass/fail switch that flips the instant you commit any one of the items below.
How the Test Is Actually Scored
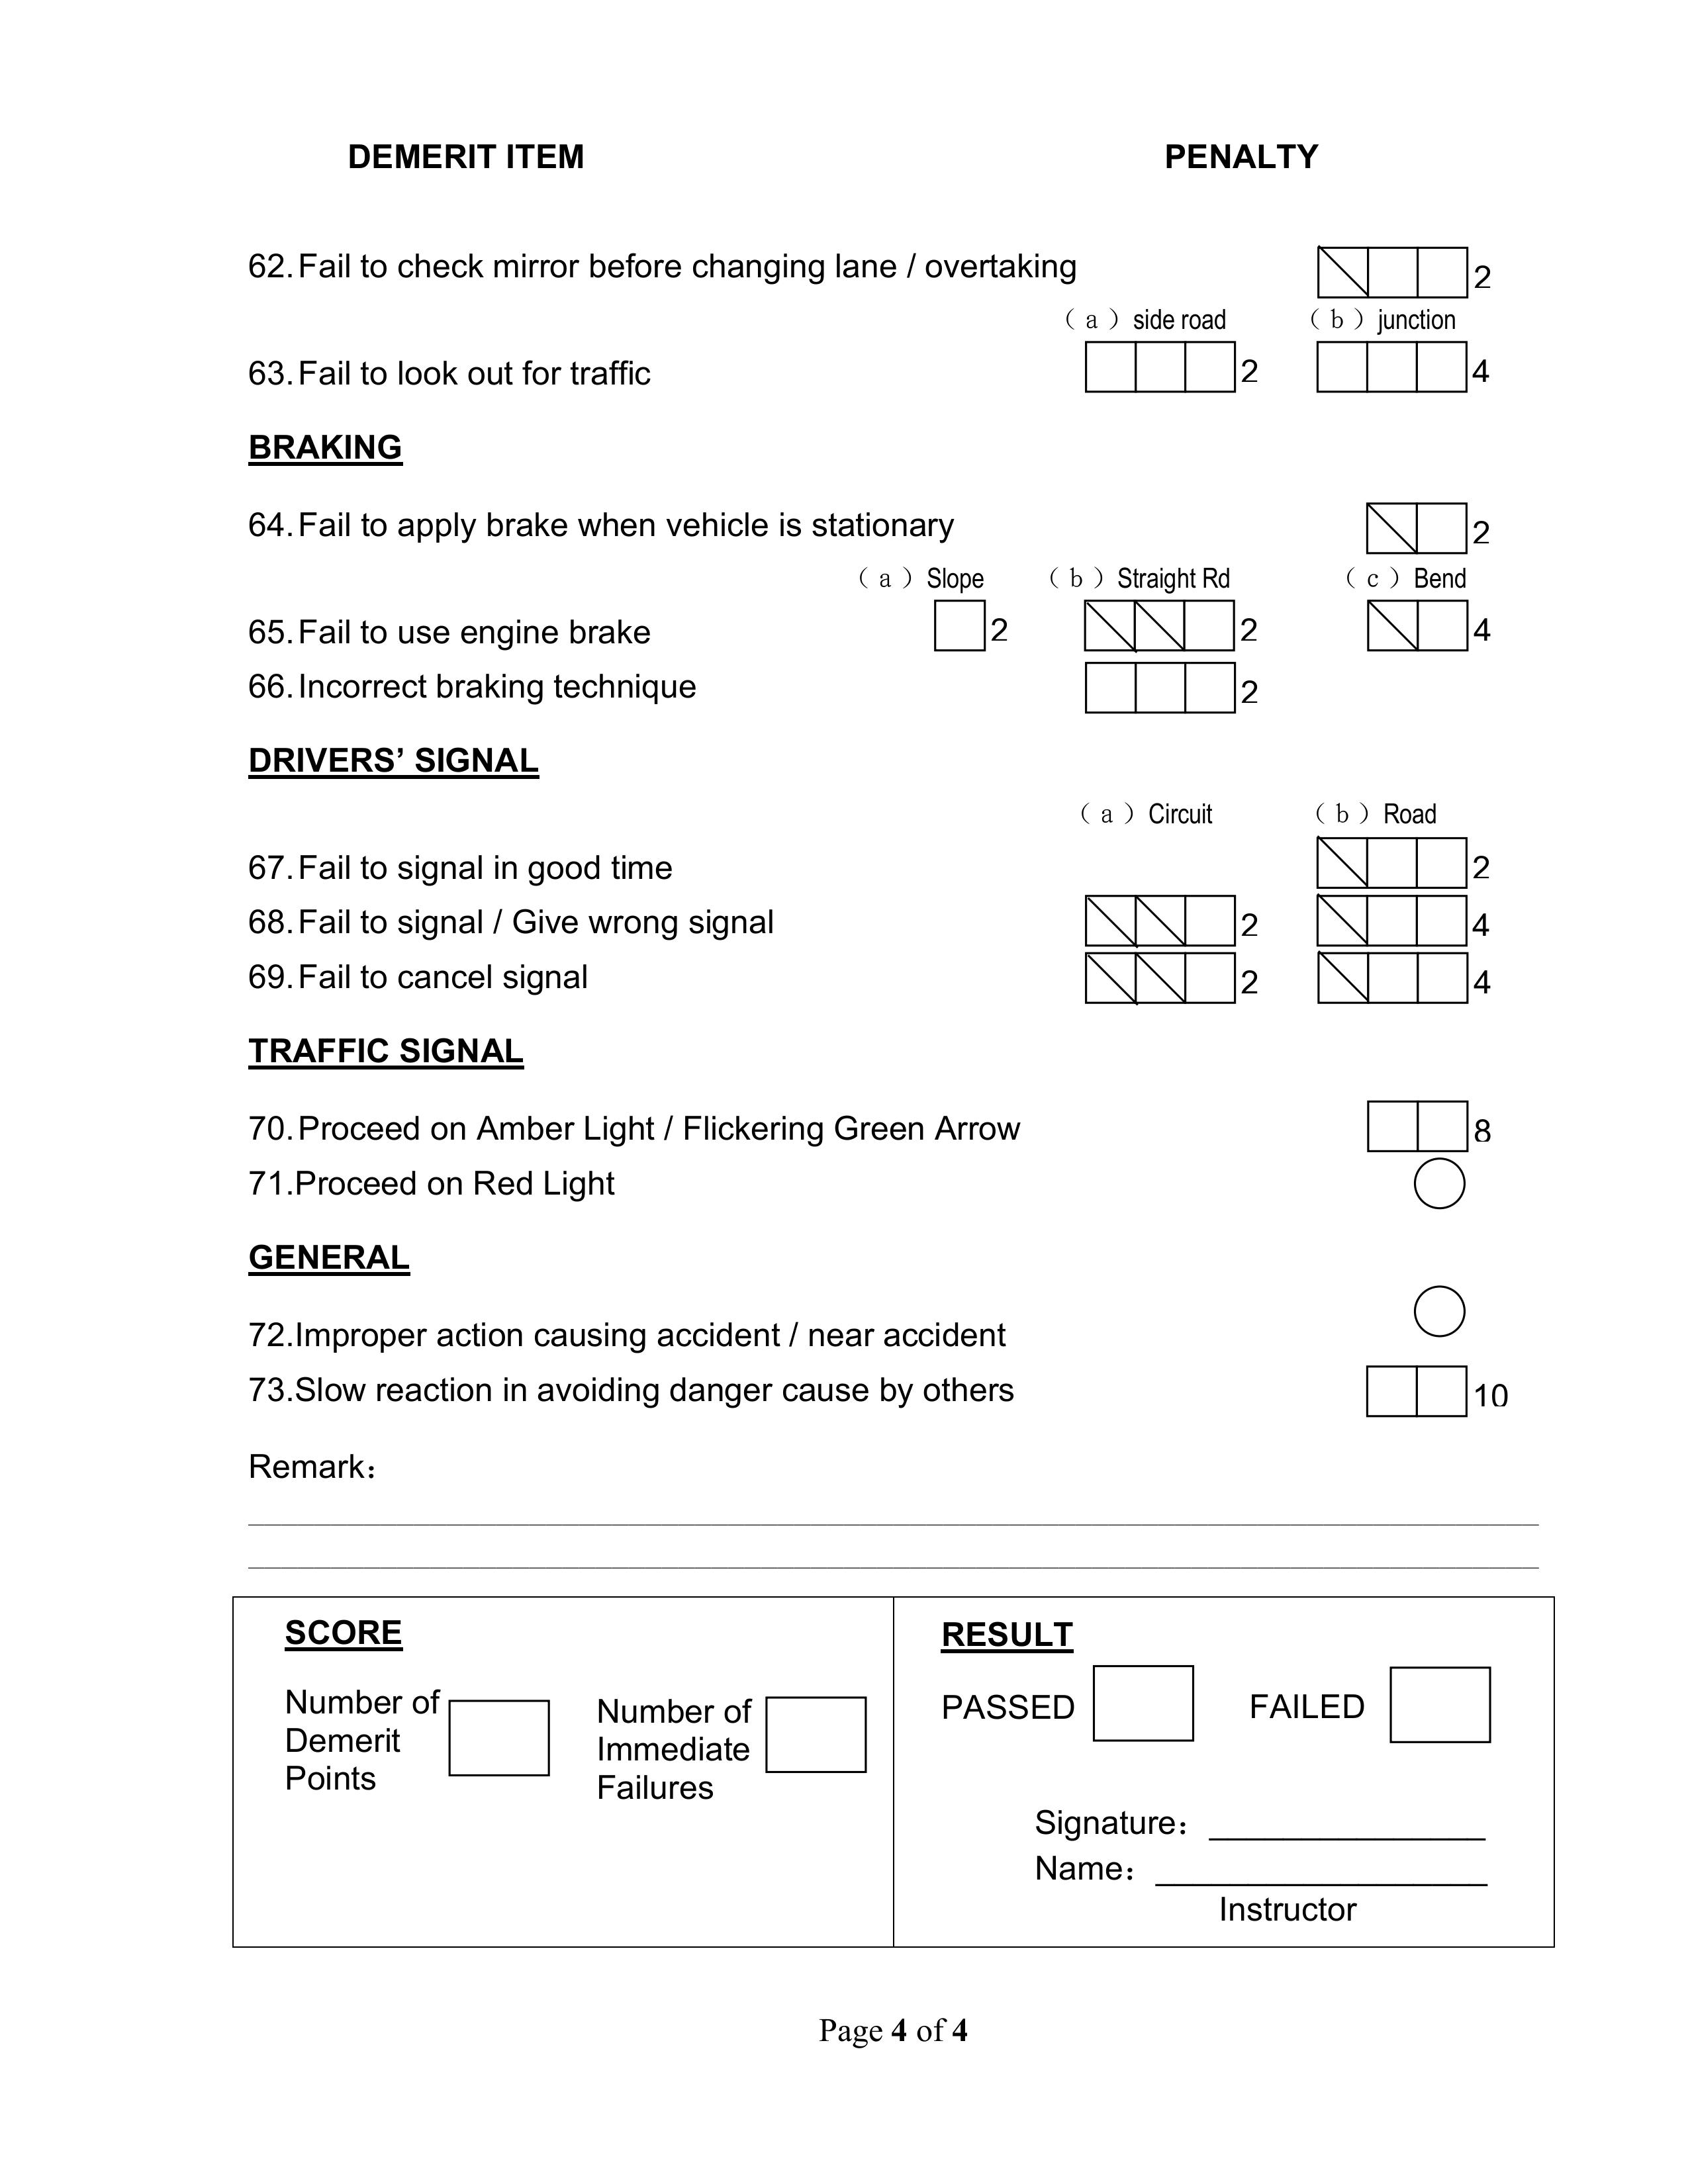
The assessor works from a printed checklist (or the tablet version of it) with 73 numbered demerit items grouped by section. Each item has a symbol beside it, and the symbol tells you what a tick costs:
Tick in a circle — Immediate Failure
Test over. The assessor will usually let you drive back, but the result is already decided.
Tick in a plain box — Demerit points
Costs you the number printed beside the row: 2, 4, 6, 8, or 10 points. Several boxes in a row means the same fault can be charged more than once.
Tick in a box with a diagonal line — Warning only
No demerit point. It is the free first offence on that item — every repeat after it lands in a plain box and costs you.
Twenty points is closer than it looks. Road hogging is 6. Following too closely is 6. Changing lane at a bend is 6. That is three ordinary mistakes and you are at 18 — one blind-spot miss from failing. The driving centres restate the same rule on their course pages, including SSDC: the test is discontinued at 20 points or on any immediate failure.
Every Immediate Failure — Circuit
The circuit is where most first-timers lose it, because the failures here are mechanical and unforgiving — a kerb is a kerb whether you touched it at 2 km/h or 20 km/h.
| Section | Immediate failure |
|---|---|
| Narrow course — S-course, crank course, directional change |
|
| Parking — parallel and vertical |
|
| Slope / gradient |
|
| Moving / reversing up the ramp (automatic vehicles only) |
|
| Emergency stop |
|
Watch the clock at parking. Running over time is an immediate failure, not a deduction — 5 minutes for parallel, 3 minutes for vertical. If your first attempt is going badly, reset early rather than nibbling at it until the time runs out.
Every Immediate Failure — Road
On the road, immediate failures are about safety and right of way. Every item here is something that would endanger somebody in real traffic:
| Section | Immediate failure |
|---|---|
| Forward driving |
|
| Pedestrians and other road users |
|
| Junction |
|
| Traffic signal |
|
| General |
|
"Remain in the junction" catches people out. If you enter a junction or yellow box before your exit is clear and end up obstructing traffic when the lights change, that is an immediate failure — even though every driver around you does it daily. Only move in when you can move out.
Demerit Items That Add Up Fastest
Avoiding every immediate failure still is not enough — you also have to stay under 20 points. These are the items worth knowing by heart, grouped by what they cost:
| Points | Demerit item |
|---|---|
| 10 |
|
| 8 |
|
| 6 |
|
| 4 |
|
| 2 |
|
Pattern to notice: the heavy items are all about other people — clearance, following distance, forcing another driver to react. The cheap 2-point items are about your own smoothness. Assessors price danger, not awkwardness, so when in doubt choose the safe, slightly clumsy option.
Strike Kerb vs Mount Kerb — The Distinction Nobody Explains
These are two separate lines on the checklist — items 1 and 2 in the narrow course, 6 and 7 in parking — with wildly different consequences, and most learners treat them as the same thing:
| What happened | Penalty |
|---|---|
| Strike kerb — your tyre makes contact with the kerb face | 10 points |
| Mount kerb — your tyre rides up onto the kerb | Immediate failure |
Ten points hurts but is survivable. Mounting is the end of your test. The practical consequence: the moment you feel the tyre touch, stop. Do not try to power through or steer out of it while still moving — that is exactly how a strike becomes a mount. Stopping and re-adjusting costs you a couple of points at most.
The same logic applies on the ramp, where striking the kerb is 4 points but striking the pole or running off is an immediate failure.
The Checklist, All Four Pages
Here is the document itself, as published by ComfortDelGro Driving Centre. Read it the way your assessor does: scan down the penalty column and find every circle. Those are the 22 ways to end your test instantly.
How to Avoid the Big Five
Across all the immediate-failure items, five account for the bulk of real-world fails. Here is what to do differently on each:
1. Mounting the kerb
Reverse slower than feels necessary — walking pace gives you time to read the mirror and stop on contact. Use your reference points every single time, even on the attempt you feel confident about.
2. Changing lane without due care
Mirror, signal, blind spot, then move — and exaggerate the head turn so the assessor can see it. Only commit once the whole car behind you is visible in your mirror. A missed blind spot alone is 4 points; an unsafe lane change is an immediate failure.
3. Rolling back on the slope
Under 1 metre is 2 points; 1 metre or more ends the test. Hold the handbrake firmly, build revs before releasing, and release only when you feel the bite. Five failed attempts to move off is also an immediate failure, so do not rush a panicky retry.
4. Not stopping at the stop-line
A rolling stop is a fail. Come to a complete, obvious halt behind the white line — count one full second before moving. The same section penalises failing to form up correctly and remaining in the junction, so approach junctions early and deliberately.
5. Running the light
Red is an immediate failure; amber or a flickering green arrow is 8 points. Both are avoidable by easing off the accelerator as you approach any signal you did not see turn green — if it changes, you are already set up to stop.
Still deciding where to test? See our official pass-rate comparison of BBDC, CDC and SSDC and our ranked list of private driving instructors.
Frequently Asked Questions
How many immediate failures can I get and still pass?
None. The checklist states it plainly: one immediate failure or an accumulation of 20 demerit points constitutes a failure. A single immediate failure ends your test regardless of how clean the rest of your drive was.
Is mounting the kerb really an instant fail?
Yes. On the Class 3/3A checklist, mounting the kerb is marked with a circle — the symbol for an immediate failure — in both the narrow course and the parking sections. Striking the kerb is different: that is a 10-point demerit, so you can survive it if the rest of your test is clean.
How many demerit points do I need to fail?
Twenty. You start at zero and accumulate points for each error, ranging from 2 to 10 points per item. Reaching 20 points ends the test. Note that individual items are heavy — three 6-point errors and one 4-point error already put you at 22.
What happens if I run out of time during parking?
Exceeding the stipulated time is an immediate failure, not a points deduction. You get 5 minutes for parallel parking and 3 minutes for vertical parking. If you are struggling, it is better to reset early and use a clean second attempt than to keep adjusting until the clock runs out.
Does rolling back on the slope fail me?
It depends on how far. Rolling backwards less than 1 metre is a 2-point demerit. Rolling backwards 1 metre or more is an immediate failure. Being unable to move off after 5 attempts is also an immediate failure.
Is going through an amber light an immediate failure?
No — proceeding on an amber light or a flickering green arrow is an 8-point demerit, one of the heaviest on the form. Proceeding on a red light is the immediate failure. The practical takeaway: if the light turns amber and you can stop safely, stop.
Am I allowed to reverse in the narrow course?
Yes, within limits. The checklist gives you a small allowance of reverse movements — the first is a warning that carries no points, and further reverses cost 2 points each. Only once that allowance is used up does it become an immediate failure. So one careful correction will not end your test.
Do the ramp items apply to me?
Only if you are testing in an automatic vehicle. The ramp section of the checklist is marked ATV only, as are the gear-selector items under moving off. Manual candidates are assessed on the equivalent clutch and gear handling instead.
Do I get to see my test report afterwards?
Yes. The completed checklist is handed to you at the end. It shows every tick, which items cost you points, and your total in the score box. If you failed, this is the single most useful document for your retest — work through it item by item with your instructor.
Most Immediate Failures Start as Theory Gaps
Right of way, stop-lines, yellow boxes, pedestrian crossings — every one of these is an immediate failure on the road, and every one is tested in the theory papers first. Nail them there and they become automatic behind the wheel.